
For beginners and advanced users alike, WordPress makes it simple to create essentially any kind of website. Even better, you don’t need extensive coding knowledge to build a site that meets your needs.
This is because WordPress is a content management system that enables the use of plugins – add-ons that extends the system’s core functionality. When you install a WordPress plugin, you can add almost any feature to your site easily and cheaply.
In this post, we’ll introduce you to WordPress plugins and offer a complete breakdown of the installation process. Then we’ll highlight some essential plugins you’ll want to check out. Finally, we’ll show you how to install and activate WPBackItUp on your site. Let’s get started!
What Plugins Are (And Why They’re So Useful)
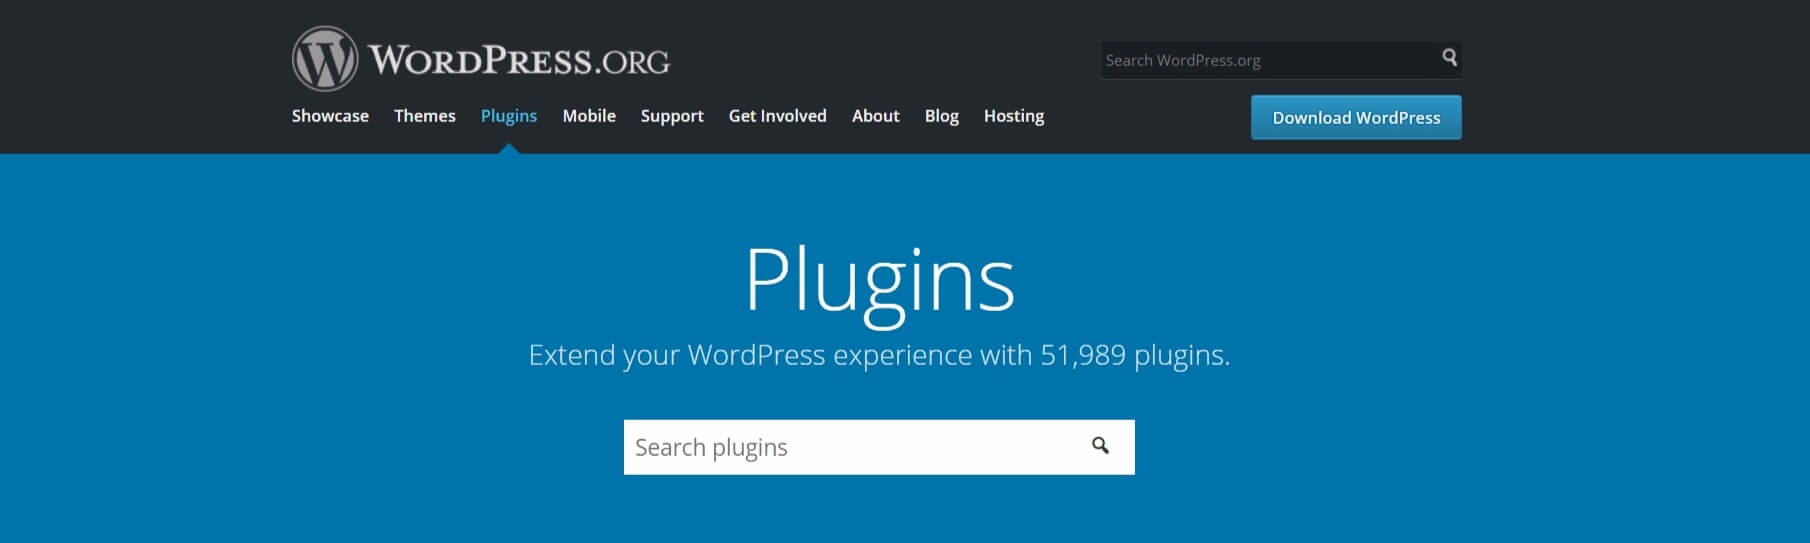
The WordPress Plugin Directory is just one source (albeit a trusted one) of WordPress plugins.
As briefly mentioned above, plugins are add-ons that you can install to the back end of your WordPress website. This simple definition doesn’t explain why they’re so valuable, however. Let’s take a closer look at how the addition of plugins to your site can be useful:
- They expand WordPress’ functionality. Plugins can make it possible to customize and optimize your site for best use, boost WordPress’s security features, connect with social media platforms, and much more.
- They offer a simple solution to website customization. With plugins, there’s usually no need for coding knowledge. In just a few clicks, you can have one installed on your website and ready to go.
- They’re often free or low-cost. Plugins enable you to make adjustments or additions to your site, without the need to hire a coder or spend exorbitant amounts on custom-made software. Even premium options are often quite affordable.
Now that you better understand the benefits of plugins, let’s discuss the process of installation so you can start using them on your site.
How to Install a WordPress Plugin
Installing a plugin on your WordPress website is simple, and there are two primary methods for doing so. We recommend automatic installation, as it’s simplest approach. However, sometimes manual installation is necessary, such as when the plugin is third-party (not from the WordPress Plugin Directory), or when your server doesn’t permit automatic install.
We also recommend that you back up your site fully before beginning the plugin installation process. This will protect the integrity of your website, and ensure that restoration is possible if something goes wrong.
Automatic Installation
The first method to install a WordPress plugin – automatic installation – is the simplest and quickest. You can perform the steps within a matter of minutes.
From within the WordPress dashboard, navigate to Plugins > Add New in the left-hand menu. Then go to the search box at the top right of the page, and search by plugin name, author, keyword, or tag:
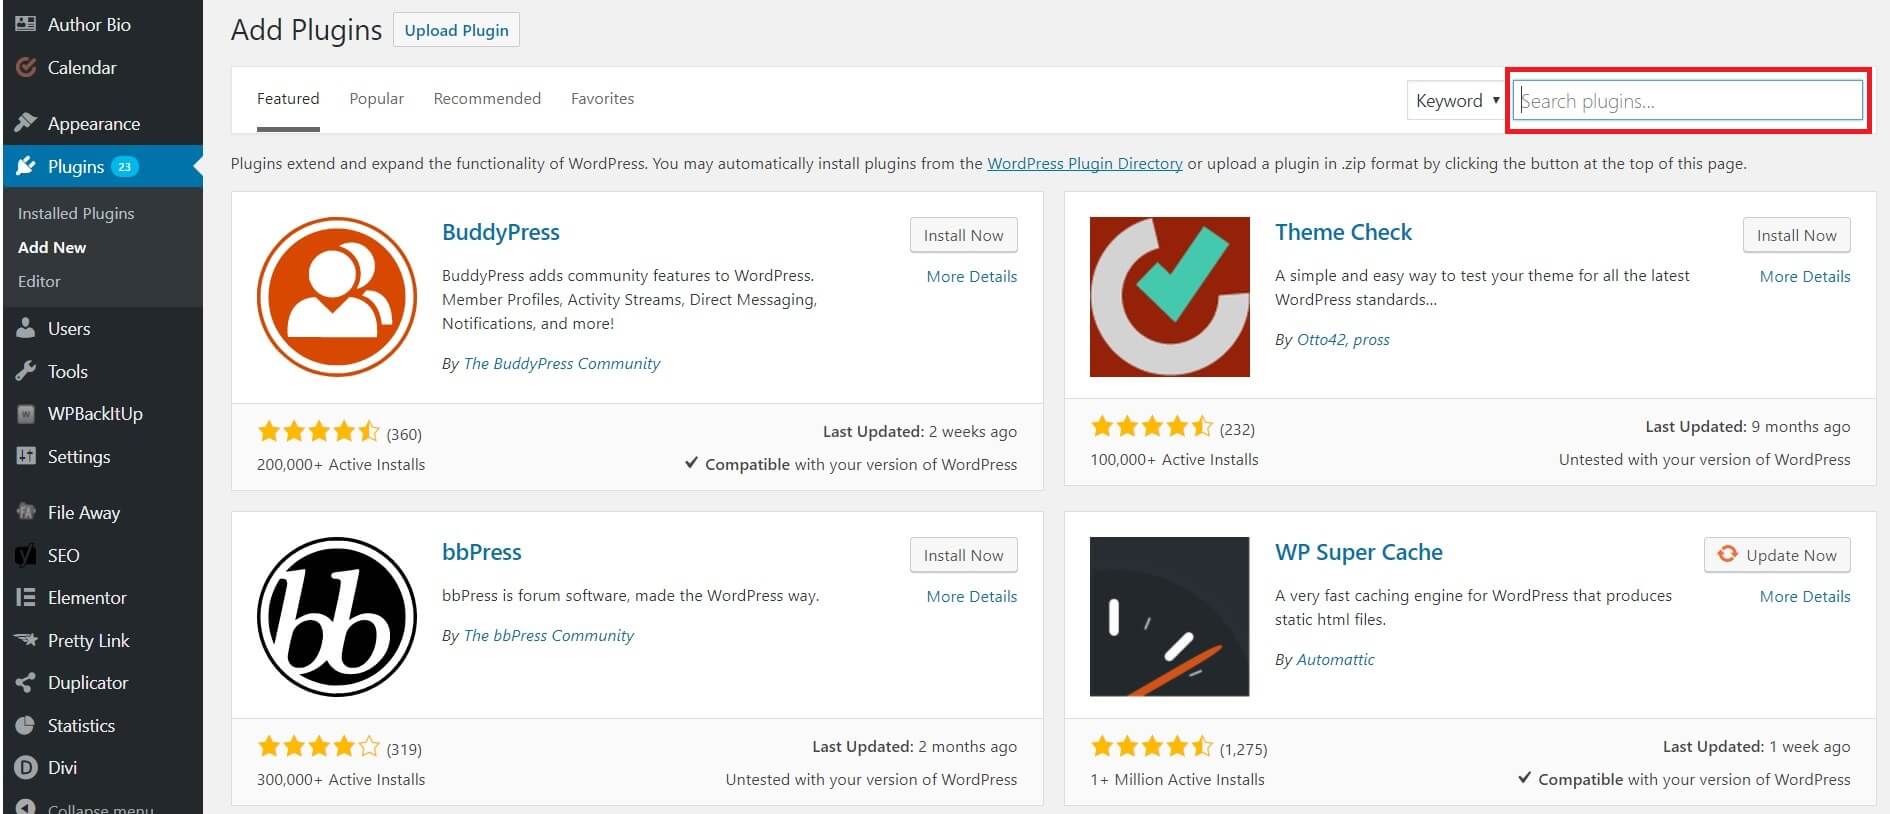
Once you’ve located the plugin you’re looking for, you can click More Details to learn more about it, or select Install Now to add it to your website:
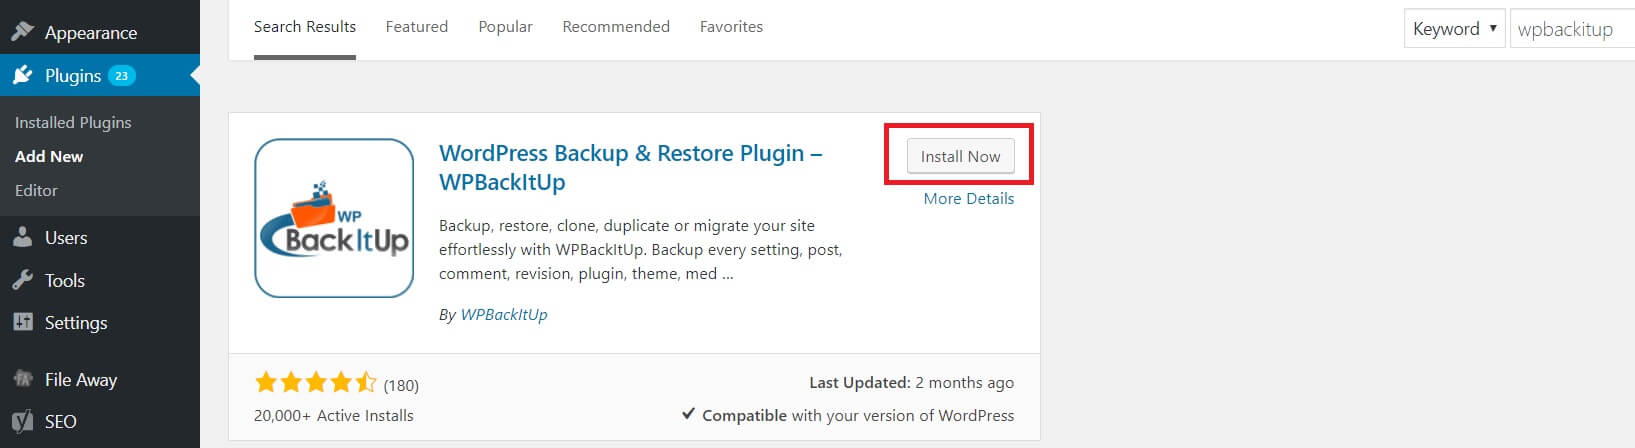
To finalize the installation process, you’ll need to activate the plugin. You can do this from the same screen. Wait until the plugin is installed, and the Install Now button will change into an Activate button. Click Activate, and you’ll be redirected to the plugin’s settings.
Manual Installation
While this next method takes longer, it may be necessary to install a WordPress plugin if it comes from a source besides WordPress.org. You’ll first need to download the plugin’s .zip file from a reliable source:

Many developers publish and sell plugins on their websites, but always be wary when downloading any files online. To be safe, stick with popular sites like CodeCanyon, and with developers you know you can trust.
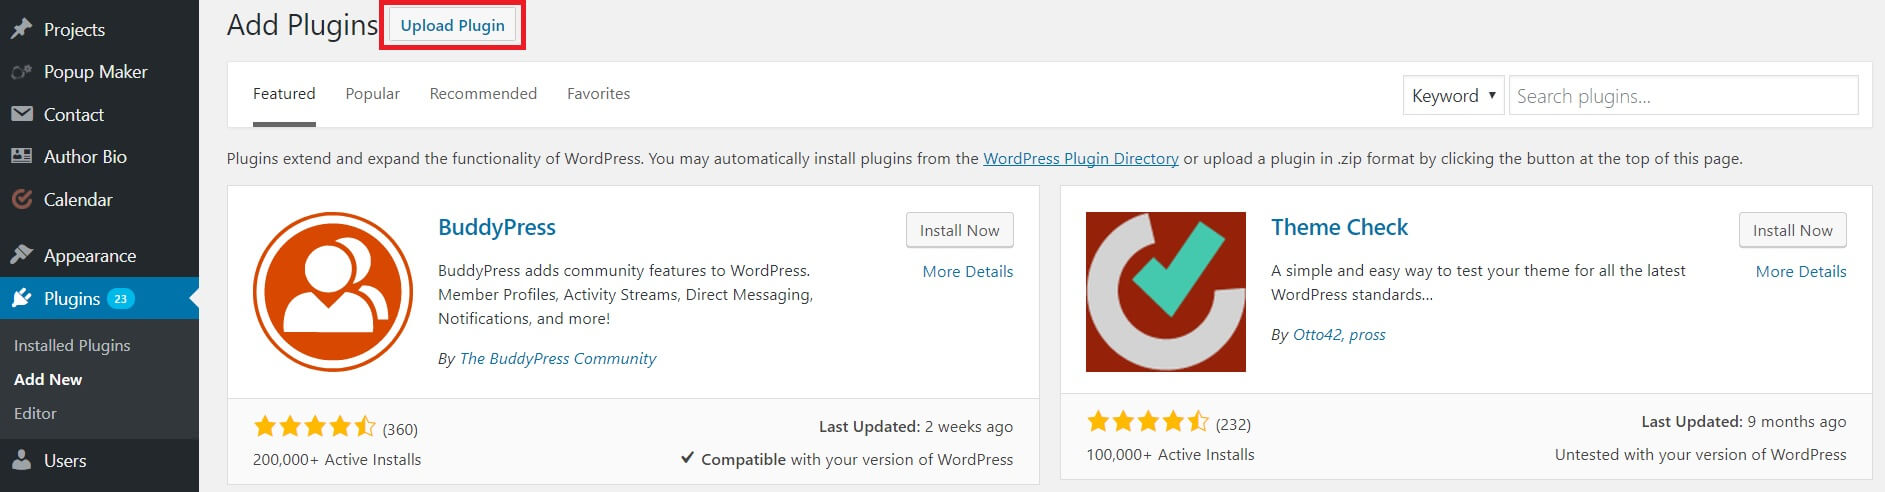
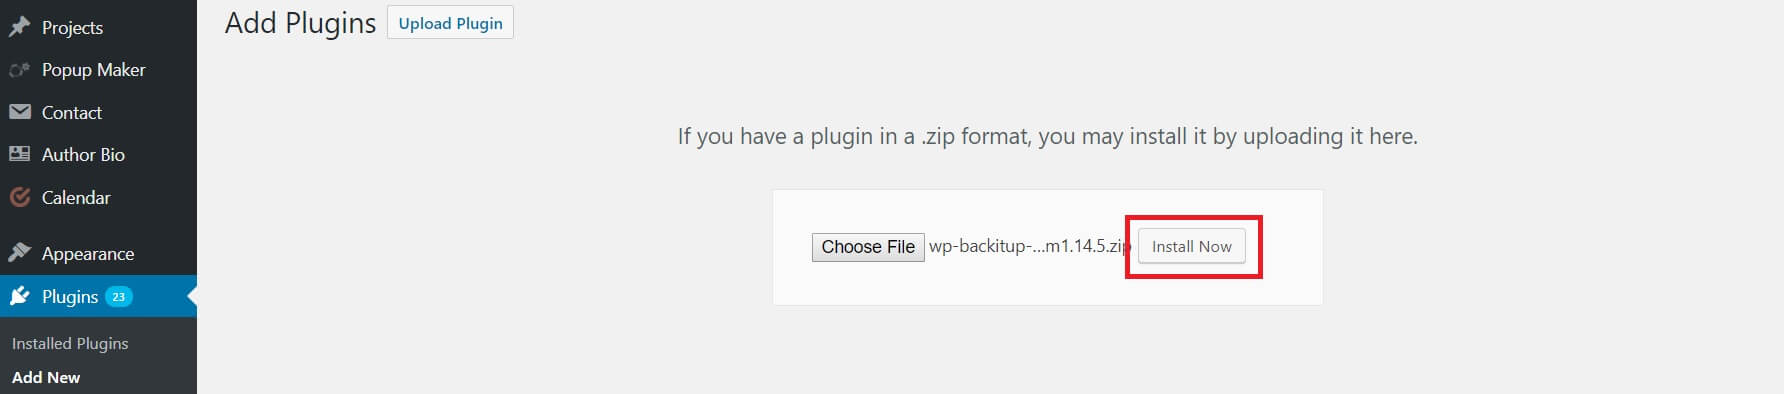
With the plugin’s .zip file downloaded, you can now begin the installation process. Go to the back end of your WordPress site, and navigate to Plugins > Add New. Instead of searching through the directory, this time select Upload Plugin:
Then click on Choose File, and locate the downloaded .zip file on your computer. Once it’s selected, click Install Now:
You’ll be redirected to an installation page, and you can now select Activate Plugin. From here, you’ll be sent to the Plugins page. Depending on the plugin, you’ll either find its settings on the Plugins page, or in the left-hand menu.
4 Essential Plugins for Your WordPress Website
Now that you know how to install a WordPress plugin, you just need to know what to install. What follows are the four essential plugins for just about any WordPress website, chosen based on reviews, features, and reliability. While these are far from the only plugins you might need, they offer a great start. Let’s dive in!
1. Wordfence Security (Freemium)
Your WordPress site will face security threats on a daily basis, from brute-force attacks to pharma hacks and more. You’ll need the best in protection to safeguard it, which is where Wordfence Security comes in.
Wordfence Security offers much in the way of website protection, including real-time blocking abilities and malware scanning. For $99 per year (or less) you can also add Two-Factor Authentication and country- or IP-blocking to your arsenal.
2. Yoast SEO (Freemium)

To get your website seen on search engine results pages, you need to rank highly for certain keywords. You can do this through search engine optimization, with the help of Yoast SEO.
Yoast SEO works by analyzing your blog posts and page content. Additionally, it enables you to easily add meta titles, meta descriptions, and breadcrumbs to your website. These features help search engines – and visitors – navigate your website.
Just like the other plugins featured on our list, Yoast SEO has two ‘levels.’ The free version includes most major features – including page analysis and keyword optimization. The paid version (which costs $89 per year) includes additional functionality, such as content insights and URL redirection.
3. Jetpack by WordPress.com (Freemium)

Search engine optimization isn’t the only way to get the most out of your site’s content. Jetpack by WordPress.com helps fill the gap by providing additional content optimization features. These include site statistics and analysis, automatic sharing via social media platforms, customizable contact forms, and more.
With Jetpack, you can even back up and restore your site’s content, although we recommend a more powerful plugin for that application (more on this below). The majority of features offered are free, but the paid version (at just $39 per year) includes high-definition video hosting and malware scanning.
4. WPBackItUp (Freemium)
Last but not least, it’s crucial to back up your site’s content regularly, so you’re safe in the event of a site hack or other such scenario. Our very own WPBackItUp is a powerful, easy-to-use tool for doing just that. With WPBackItUp, you can back up your entire website – including content, database files, and even plugin and theme files – with the click of a button.
The free plugin includes one-click backup and customization options (so you can back up everything, or only what you need). The paid version – starting at just $79 per year – also includes backup scheduling, one-click restore, and even site migration and cloning functionality.
How to Install and Activate WPBackItUp On Your Website
In the past, WPBackItUp was a single plugin. This meant both community (free) users and premium users had the same plugin, but the latter would be required to enter a license to activate premium features. With the recent split of WPBackItUp into two plugins – WP BackItUp Community Edition and WP BackItUp Premium – the installation process is now much simpler.
To gain access to the full set of features, you will need to use the manual process to install a WordPress plugin that we discussed earlier. Once you’ve finished installing and activating the plugin on your site, you can then update your plugin’s license information. Your license is located on the WPBackItUp website, under Account > Your Account > View Licenses:

You can then enter that license key into the back end of your WP BackItUp Premium plugin, and begin to enjoy the full suite of features right away!
Conclusion
WordPress plugins are invaluable, because they can extend the functionality of your website. They enable you to create a site that fits your needs, and can even work to protect it (such as with Wordfence Security and WPBackItUp) and optimize its content (using tools like Yoast SEO and Jetpack by WordPress.com).
In this post, we’ve introduced plugins and shown you how to install a WordPress plugin on your site. To quickly recap, you can use:
- Automatic installation. A process that involves working from the WordPress back end and installing plugins directly from the WordPress Plugin Directory.
- Manual installation. A more involved method for installing third-party plugins and uploading their .zip files to your dashboard.
Do you have any questions about WordPress plugins or how to install them on your site? Let us know in the comments section below!
Image credit: Pexels.